Contents
How to Record Vocals on Phone Professionally
Recording the vocals professionally cannot be ignored if you want to make a professional song. But if you are tight on budget or don’t have a professional mic available and want to record on your smartphone, continue reading..
So, how to record vocals on your phone professionally..
Here are the steps to record your vocals professionally on your smartphone-
- Check if your phone can record lossless or raw audio. You can Google it.
- Download an app that can record in a lossless format or wave (wav). The files will have big size.
- Get a plosive filter or a pop filter.
- Prepare your room or your recording space for recording. Make it noise proof.
- Set up the phone for recording.
- Record a few takes of the same song for selecting the best take.
- Use a professional software for editing and processing the vocals.
- Correct, Compress, EQ, Saturate your vocals to polish them further.
If you are planning to make this song commercial, you must know 10 Important Music Licenses and Contracts.
Anyways, let’s see each step in detail…
Before we start, let me introduce you to our –
Make sure to check it out.
1. Does Your Phone Record Lossless Audio
For professional vocals, recording high quality lossless audio is the most important step.
If a recording is not in a lossless format, your vocals will suffer.
- One such lossless format is .wav! This is used everywhere in audio universe.
A lossless format in simple term gives you the most detailed sound and opportunity to further process the recording without losing fidelity.
Read – Music Production On Smartphone
In other words, if you record in lossless or wav format, you can edit the vocals and color them to your need and still the vocals will sound pristine and without artifact.
On the other hand a recording that is done in a compressed format, has less details and suffers artifacts with a few edits. As a result, the vocals lack fidelity which distract the listeners and spoil their experience.
Hence getting a vocal recording high quality is highly important and indispensable. Period.
Google your phone’s model and try to look for if it can record in lossless or wav format?
In since recent times the smartphones have taken the place of computers in many tasks and have become so advance that most of the media stuff can be done through them.
Recording is one of them.
I assume that smartphones launched post 2018 must be able to record in wav format.
Read – 41 Mixing Tips From Grammy Winning Engineers
2. Download A Lossless Recording App
Since you now know the importance of recording in a lossless format, you need an application that records in this format.
You can google for the apps to record in wav.
You can get a few apps for that.
Just find a free one or purchase if you want.
I have used Dolby On for this purpose, its free and records in wav format which is what we want. On top of that Dolby is a no brainer since it’s already a reputable and world known brand in audio technologies.
Now when you first time open the app, by default it records in compressed format.
You need to tweak the settings of the app for it to record in a lossless one.
When you open the app, click on the Gear icon ⚙ at the bottom right corner of the recording screen.
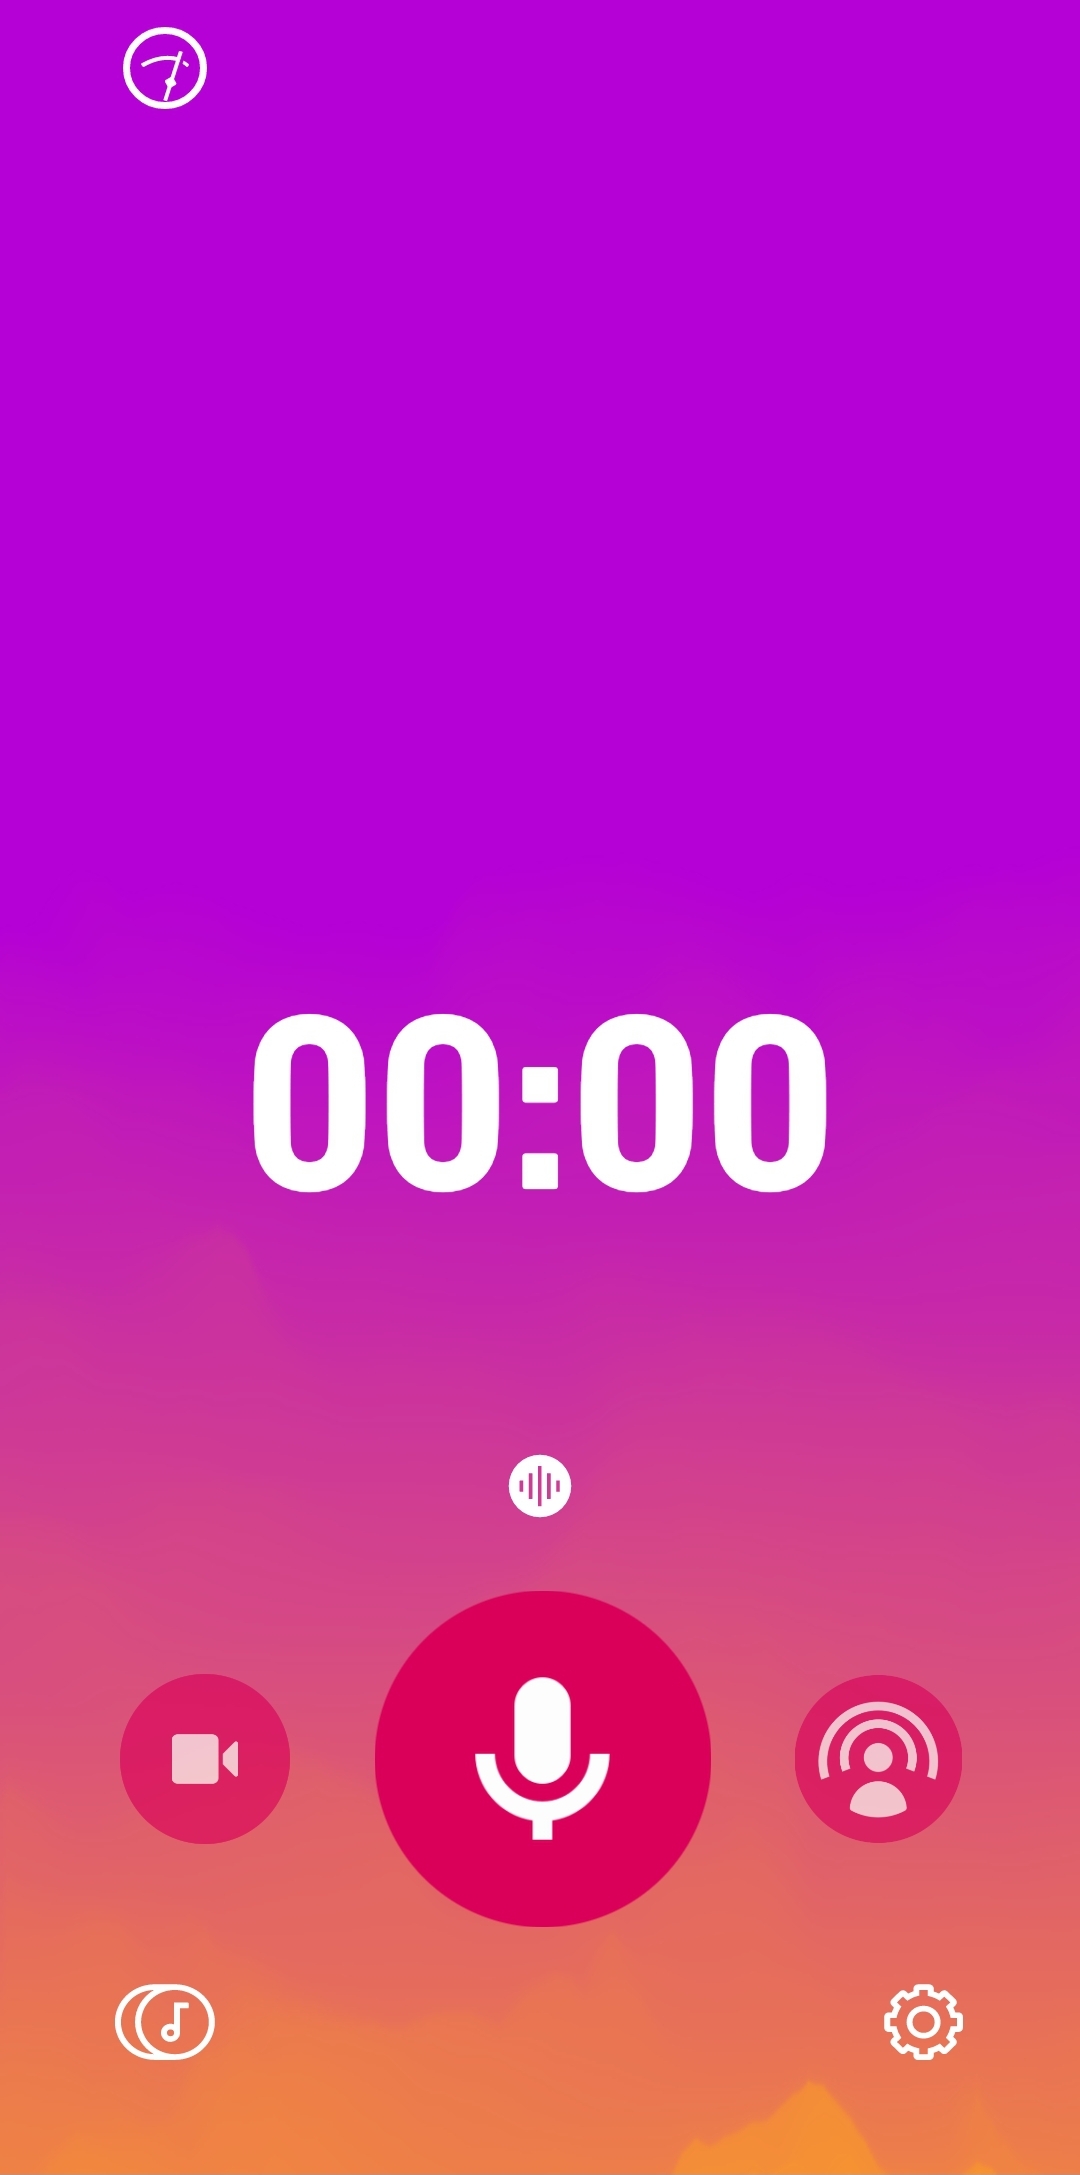
Image 1.1
Click on the gear icon and scroll down a little to find lossless audio.
You will find a toggle switch there which is set to off right now.
- Turning it on will record the audio in 48 kHz, 16 bit quality. The format will be wav.
Turn the toggle switch on to start capturing lossless wav format.
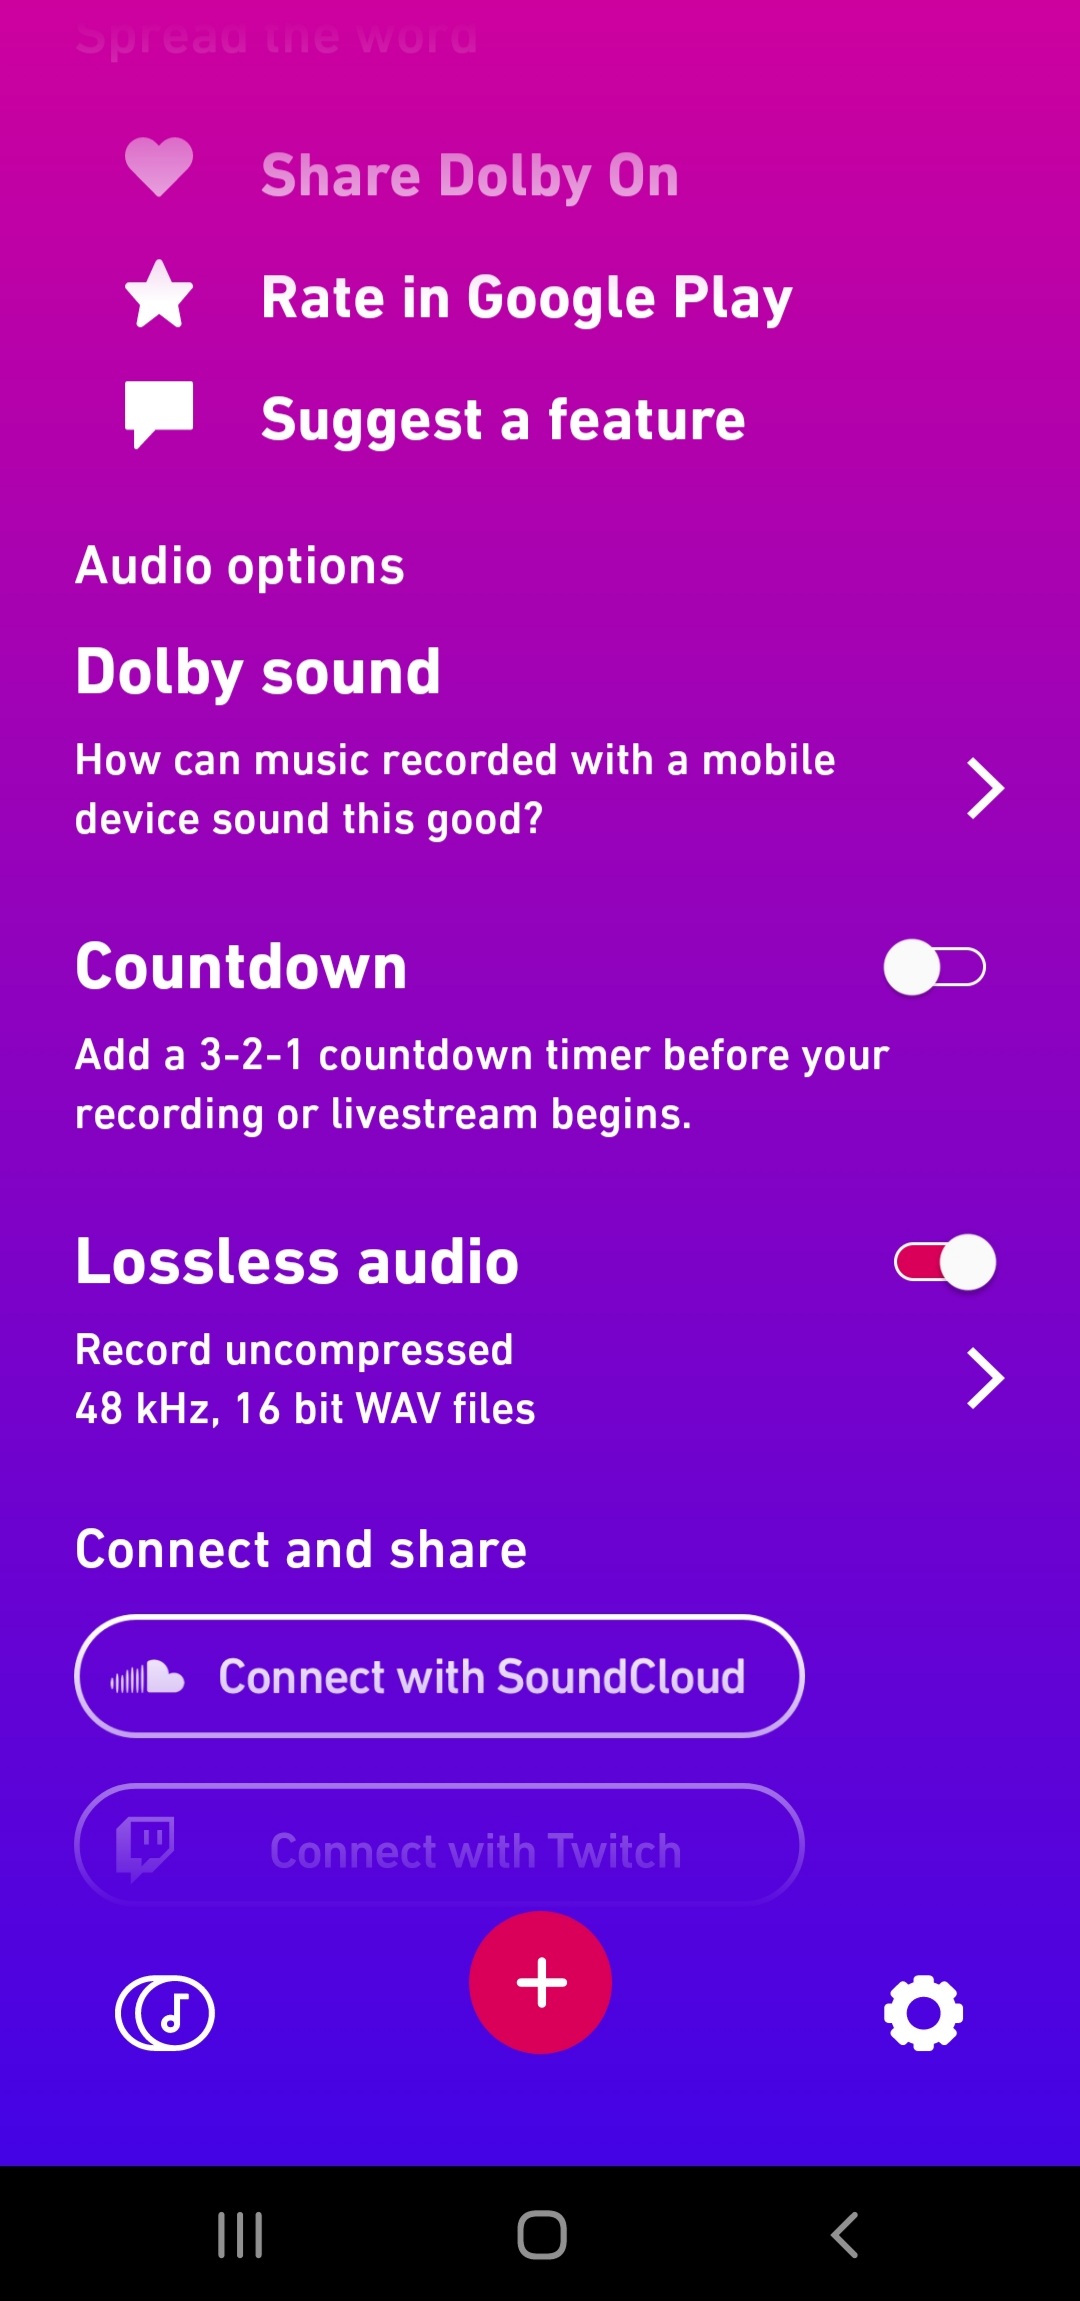
Image 1.2
- The image shows the lossless recording turned on.
Read – Mixing With Compression
3. Get a Plosive Filter or Pop Filter
Mics are very sensitive.
They capture every nuance of the sounds which are fed into them.
This is required as well because singers try to put so much detail into their singing and they want those details to come through.
With that said, there are certain elements that you don’t want to be there in your vocal recordings. These elements are call plosives or sounds that result when a sudden blow of air hits the mic.
This sudden blow of air on any sensitive mic sounds like a low frequency hitting sound.
If you have ever used a mic you must be knowing how it sounds when you say words starting with B and P into the mic.
When we say such words, they blow out a large volume of air from our mouths.
No it’s no surprise because those words are just meant to sound that way.
You need a plosive filter or a pop filter to block the sudden blow of air from hitting the mic which could result in an unwanted hitting sound in the recording.
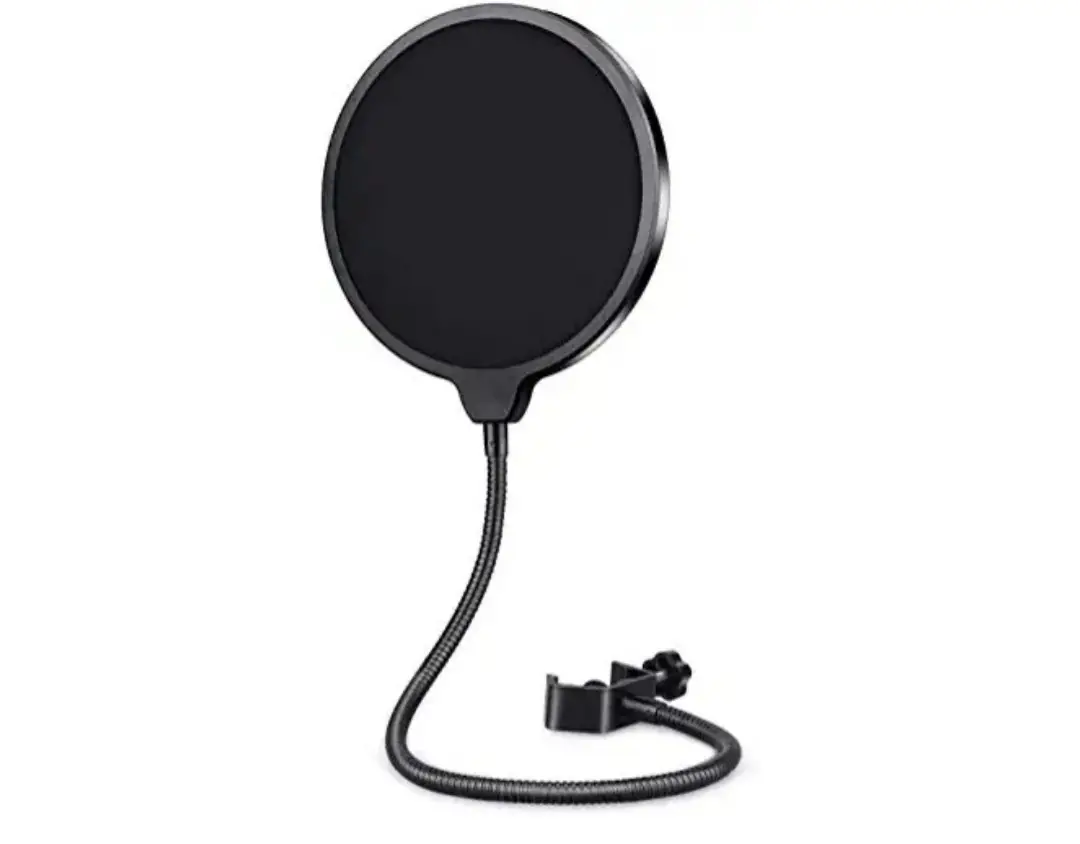
Image 1.3
The image above is the pop filter.
It should be held in front of the phone’s mic between you and the phone.
- You can keep the phone at a height of your mouth and attach or hold the filter between you and your phone.
Make sure the distance between you and the filter is around 6 inches.
And same space should be between the filter and the phone.
This is to avoid the proximity effect which is an exaggerated low end in your recording.
4. Prepare Your Recording Room or Recording Space
Every professional vocal recording as you know is done in a studio.
The studio is setup to keep the noises out of the recording area.
To make your vocal recordings sound professional, you need to keep it noise proof.
- The recording should contain no other sound than your vocals.
Even if a little noise enters into your vocal recording, it will get enhanced when you process your vocals while mixing.
Read – Mix Bus Processing
Secondly the song won’t sound professional at all and you could make a bad first impression on your listeners.
- It is very crucial that you make arrangements to make your recording space fully noise proof.
There are many methods for that.
First you need to close the doors and windows of your bedrooms.
Use soundproof sealants for doors and windows which you can easily find online.
Next you want to stop the reflection that happens in a room when your voice bounces back after striking the walls, ceiling and the floor and the objects in your room.
This is clearly audible when you listen to your vocal recordings back.
To stop this audio reflection from occurring –
- Cover the walls of your room with sound absorbent material. The rockwool panels are a good option.
- Stuff your room with furniture, quilts, curtains etc. so that more and more sound gets absorbed by them.
- You can use a diy sound absorbing panel made with towels or sound absorbing foams on your walls.
- Stand against a wall and cover that wall with a sound absorbing material while recording.
- Open an umbrella and stuff it with towels or foams on the inside and hold it so that it covers your back. This will prevent the sound to hit the wall behind you and gets absorbed by that umbrella instead.
- Block the reflections coming from behind your phone with a curved sound absorbing panel or place your phone in a portable vocal booth.
- With any type of arrangement, don’t forget to use the pop filter while recording.
The whole setup should look something like this-
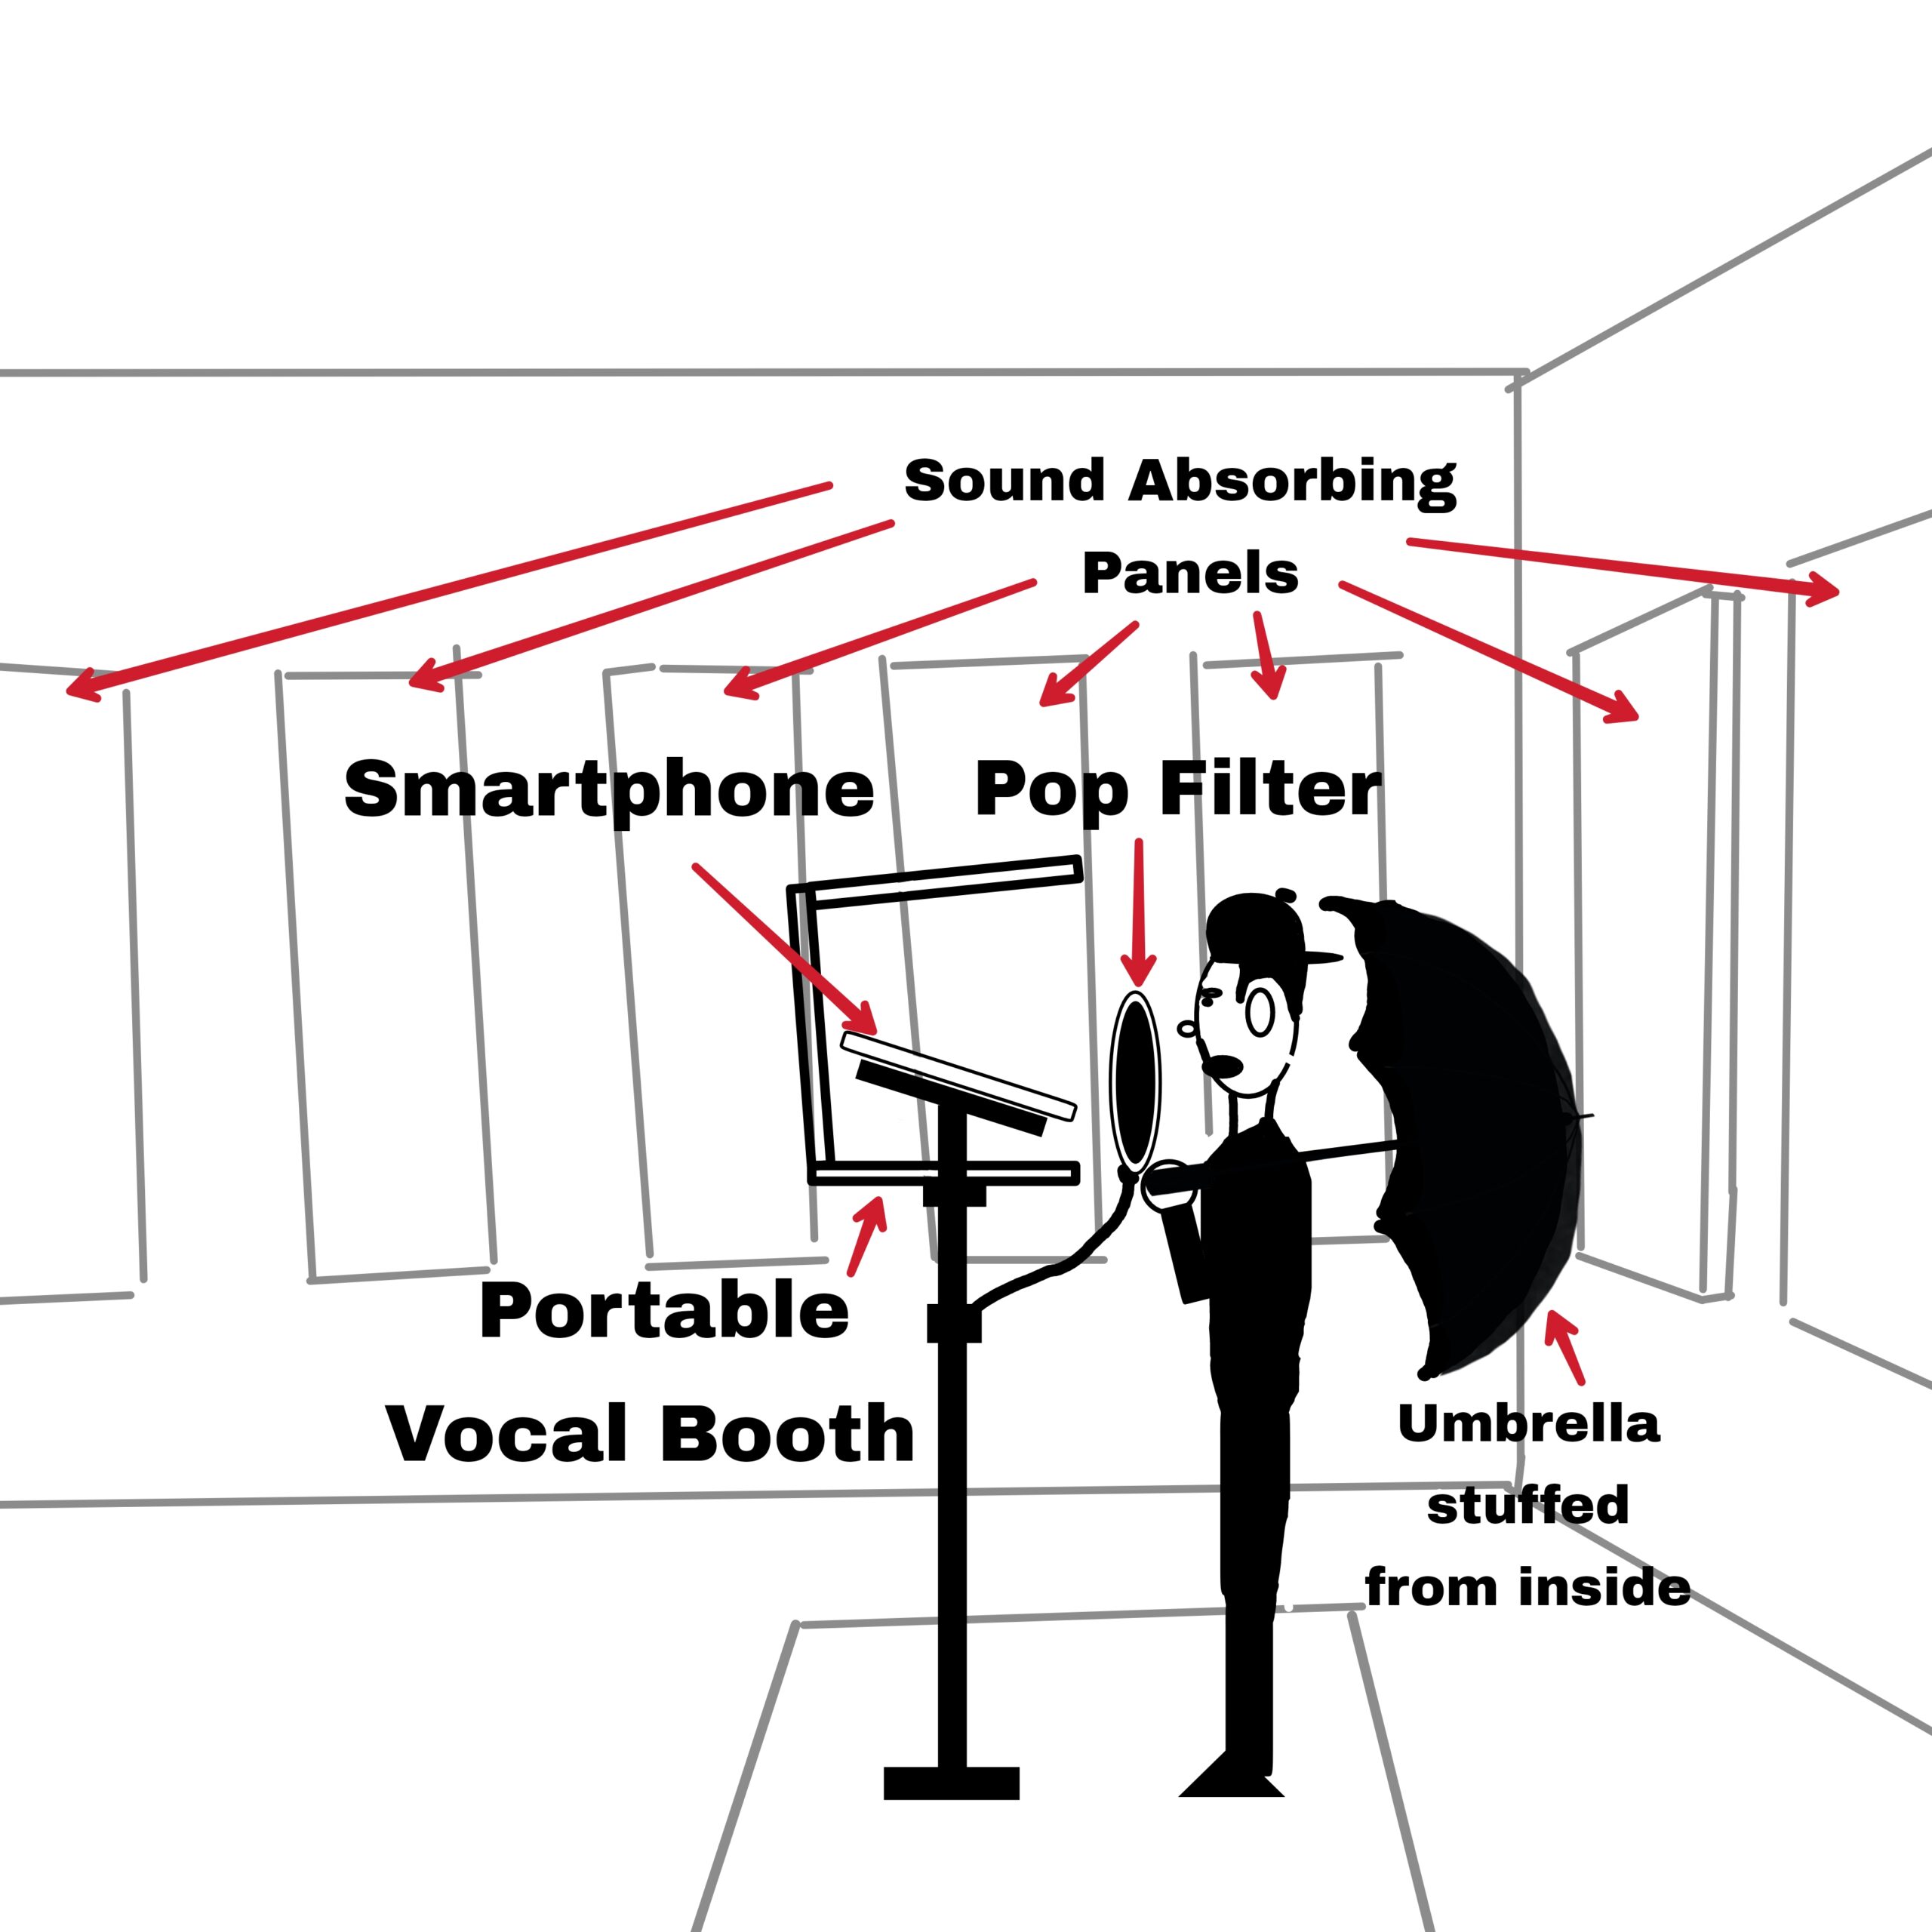
Image 1.4 | Smartphone Recording Setup
See how our producer Abraham is recording on his smartphone in his bedroom.
One thing to notice in this diagram is that if you don’t have the panels for the wall behind you, you can then use an umbrella, stuffing it from the inside with sound absorbing material.
Even thick towels will do.
See the pop filter is in between the phone and the face.
- The portable vocal booth in the diagram is 3 dimensional. It’s a box in reality, in which you place your smartphone. I wanted to show the mobile phone inside that’s why I made it 2 dimensional here.
5. Setting Up The Phone for Recording
When you are done taking care of the noise proofing and have made necessary arrangements for keeping the room reflections controlled, it’s time for the hero of our story to get ready.
The smartphone now needs to get ready for the recording session.
- Make sure to check that the batteries will stay alive for the whole session.
- Make sure to shut the notifications off and either switch the phone to airplane mode to avoid any call. Even set the vibration off because if your phone vibrates in the middle of the recording, the buzz will get recorded and the recording will be a waste. So turn the phone fully silent with even the vibrations turned off.
Now place your phone flat on whatever you are keeping it on and keep its mic directly towards you.
6. Record a Few Takes of Your Vocals
Whenever you are doing any productive work and want to have a professional impact with that, always make more than one version of it if time allows.
Avoid it only when the time is less.
Having more than one version of any productive work gives you the opportunity to select the best version out of those. With more versions you get more options. And no version is the final version because there is always a chance for better.
- So always have more than one take to give you options and lets you select the best one. You can even take good parts from each take and compile all the selected one to get the best final output.
7. Use Professional Software for Processing Recording
Recording with a smartphone alone won’t finish your work of making a song.
You need a medium on which you can further process and polish your recordings.
Professional DAWs give you all the necessary tools to make your vocals shine.
- A few of them are Ableton Live, Logic Pro, FL Studio, Pro Tools, Cubase, GarageBand etc. There are a lot of them, learn any one.
Read – How To Master Your Song In Ableton Live
Melodyne is a dedicated software to work with vocals only.
It can tune an out of tune recording which is a must if you are making a professional song.
You can make your smartphone recordings sound professionally recorded processing them through these software and can even compete with the pros.
8. Vocal Processing
Vocal processing is divided into following steps-
- Tuning
- Gating
- Corrective EQ
- Compression
- Additive EQ
- De-essing
- Saturation
All the professionals go through these steps for making a vocal recording sound as polished as possible.
With tuning, you make vocals fit in the key of the song.
Gating mutes any noise that may be audible during silent portions of your recording.
With corrective EQ you remove any ugly frequency or any resonances in your vocals.
Compression makes your vocals consistent in volume.
Additive EQ is for enhancements of pleasing or necessary frequencies in the vocals.
De-ssing removes the piercing “S” sounds from the vocals whenever you say a word that has “S” in it.
Saturation gives color to the vocals. The final polish to make the vocals shine is done with saturation. Just like in videos or images you increase their color by increasing saturation, in the same way the audio saturation works.
Read – 31 Mastering Tips From The Best Mastering Engineers,
41 Mixing Tips From Grammy Winning Engineers
Check this out if you haven’t already – Apache Essentials Drum Sample Pack
Conclusion
With the development of smartphones it’s so easy that many multimedia tasks can be efficiently handled on them now.
Recording a vocal professionally on them is no challenge today.
I have myself recorded vocals for a client a few years back and the result was surprising!
It so happened that the client wanted to get a lo-fi vocal for a project but to our surprise it came out as if it was done in a studio (with some extra efforts of course).
That day I learned that smartphones can do miracles!
Share the article for me if you learned something.